"...in the wake of the bloody engagement with the Federated States of America and the prolonged duel with the Enterprise-class Dreadnought Dortmunder, the Markgraf was badly damaged and exposed. Struggling through the bitter waters of the North Sea, the remnants of Baron Grunner's Hunter Fleet sought protection amid the oil fields, hoping to mask the location of the Dreadnought while it was repaired.
Calls for assistance were sent out to Prussian-held ports along the Norwegian and Danish coast, demanding reinforcements to protect the vessel. Encrypted with the latest Prussian ciphers, these messages were nonetheless intercepted and decoded by the brigand mercenaries of the Black Company. Their contacts in the Britannian Admiralty quickly promised them untold riches for the capture or destruction of the rogue Dreadnought, and using their advanced technologies they made all speed for the North Sea oil fields.
Deploying a massive fleet of aerial and naval vessels out of hidden ports on the Scottish coast, the Black Company were not content to destroy the Markgraf but wished it for themselves - much as they had done two years previously, they would capture a Dreadnought and drag it back to their pirate anchorage. Their fleet was unnaturally fast and could reach the target before any Russian or Britannian squadron, but they would not beat the Wolf Pack of renowned Submarine Commander Jurgen Grönemeyer...
Battle would be joined amid the dense Visund Oil Field..."
The Hunt for the Markgraf (cont.)
Naval Battles of 1873
Welcome to another chapter of the
Hunt for the Markgraf and the return of the Black Wolf Mercenaries! Long thought smashed at the end of the
Greenland Campaign, the Black Company has rebuilt and refitted, and now sail with Britannian coin against the Prussian Empire.
 |
| The two fleets smash through the Visund Oil Field in search of the Markgraf |
THE SCENARIO
The mission for this week was taken from the
Ironclad Campaign system by Spartan Games' forum member
Drachenfutter. Thanks for this great resource! I will be using several of the scenarios taken from this pack in the coming weeks for the
Hunt for the Markgraf, and really appreciate all the work that has been put into it.
The mission is called King of the Hill, with the Markgraf being the Hill. Both players would have to flood the "neutral focal point" with as many bodies as possible by the end of four turns, and the winner at the end would carry the game. Victory Points would be used if nobody dominated the focal point at the end.
 |
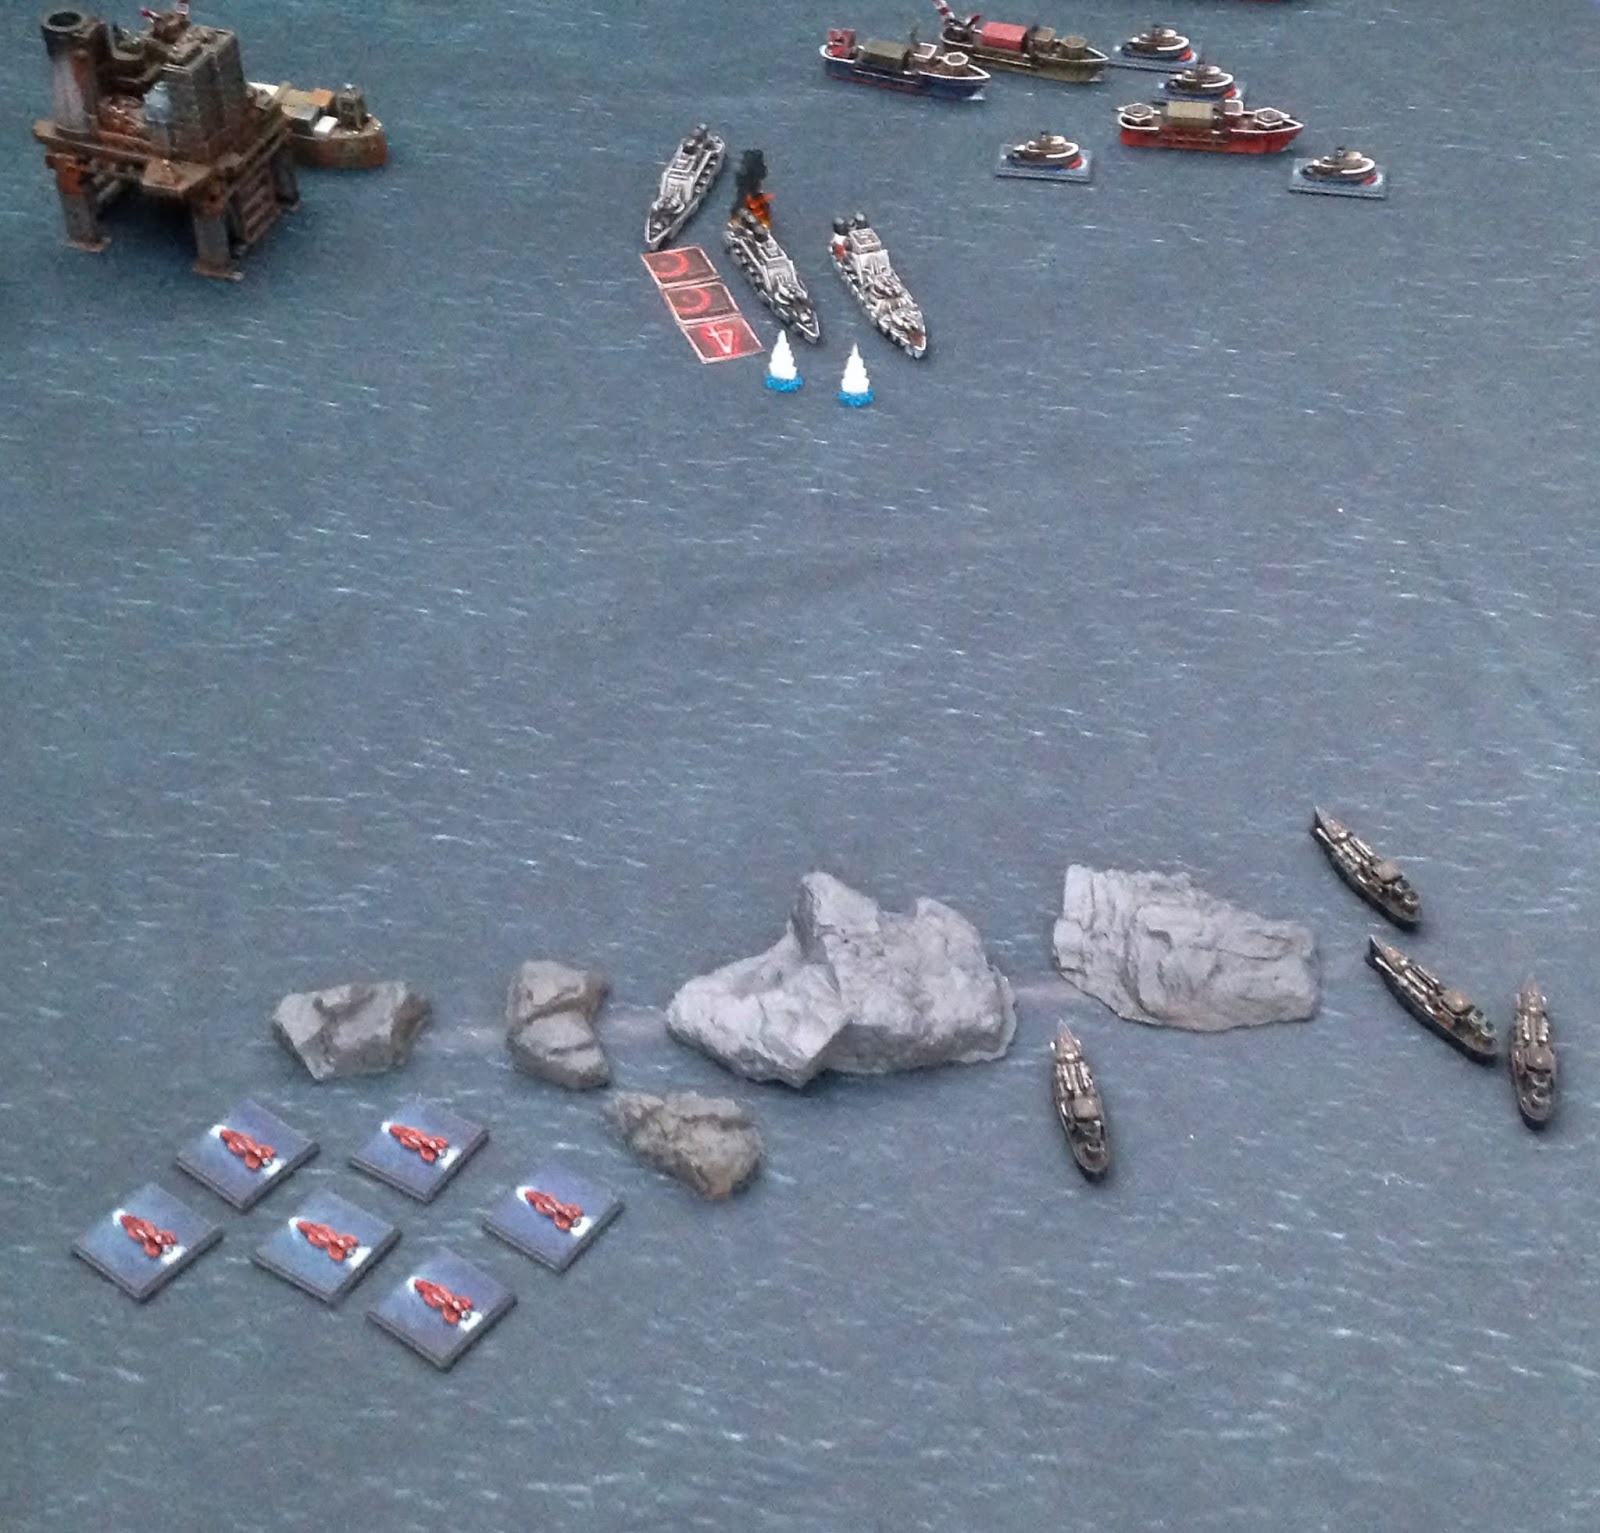
| The Markgraf lies between the two fleets, at their mercy |
 |
| Civilian vessels and merchant ships flee the scene |
THE FLEETS
 |
| Black Wolf Mercenaries out of Ammassalik, hired by the Kingdom of Britannia to capture the Markgraf |
The Black Wolf Mercenaries
Royal Fortune - One Retribution-class Sky Fortress accompanied by one wing of five Fighter Planes and one Reconnaissance Plane
Two
Death Bringer-class Submarines
Two
Nemesis-class Battle Cruisers with
Guardian Generators
Two
Manticore-class Support Skimmers with
Main Turrets and each accompanied by six
Reaper-class Attack Submarines
One Squadron of three
Chimera-class Medium Airships
Two Squadrons of four
Fury-class Frigates
One Squadron of four
Wraith-class Airships
Two Wings of five Fighter Planes
 |
| The Prussian Hunter Fleet tasked with the recovery and protection of the Markgraf |
The Prussian Empire
SMS Kaiserin Elisabeth II - One Elbe-class Fleet Carrier with Elite Crew, accompanied by one wing of five Dive Bombers and one wing of four Fighter Planes
U-113 - One Sturmbringer-class Submarine
Verstärkung Squadron consisting of two
Uhlan-class Cruisers and one
Hussar-class Gunship
Donner Squadron consisting of one
Adler-class Heavy Bomber and three
Zerstorer-class Strike Bombers
Two Squadrons of two Donnerfaust-class Support Cruisers and one Havel-class Light Carrier, each accompanied by one wing of four Fighter Planes
One Squadron of four Arminius-class Frigates
One Squadron of four Saxony-class Corvettes
Two Wings of five Dive Bombers
DEPLOYMENT
 |
| The Black Company have a mixed deployment, with the Guardian Generators of the Nemesis-class Battle Cruisers positioned to protect as many vessels as possible |
 |
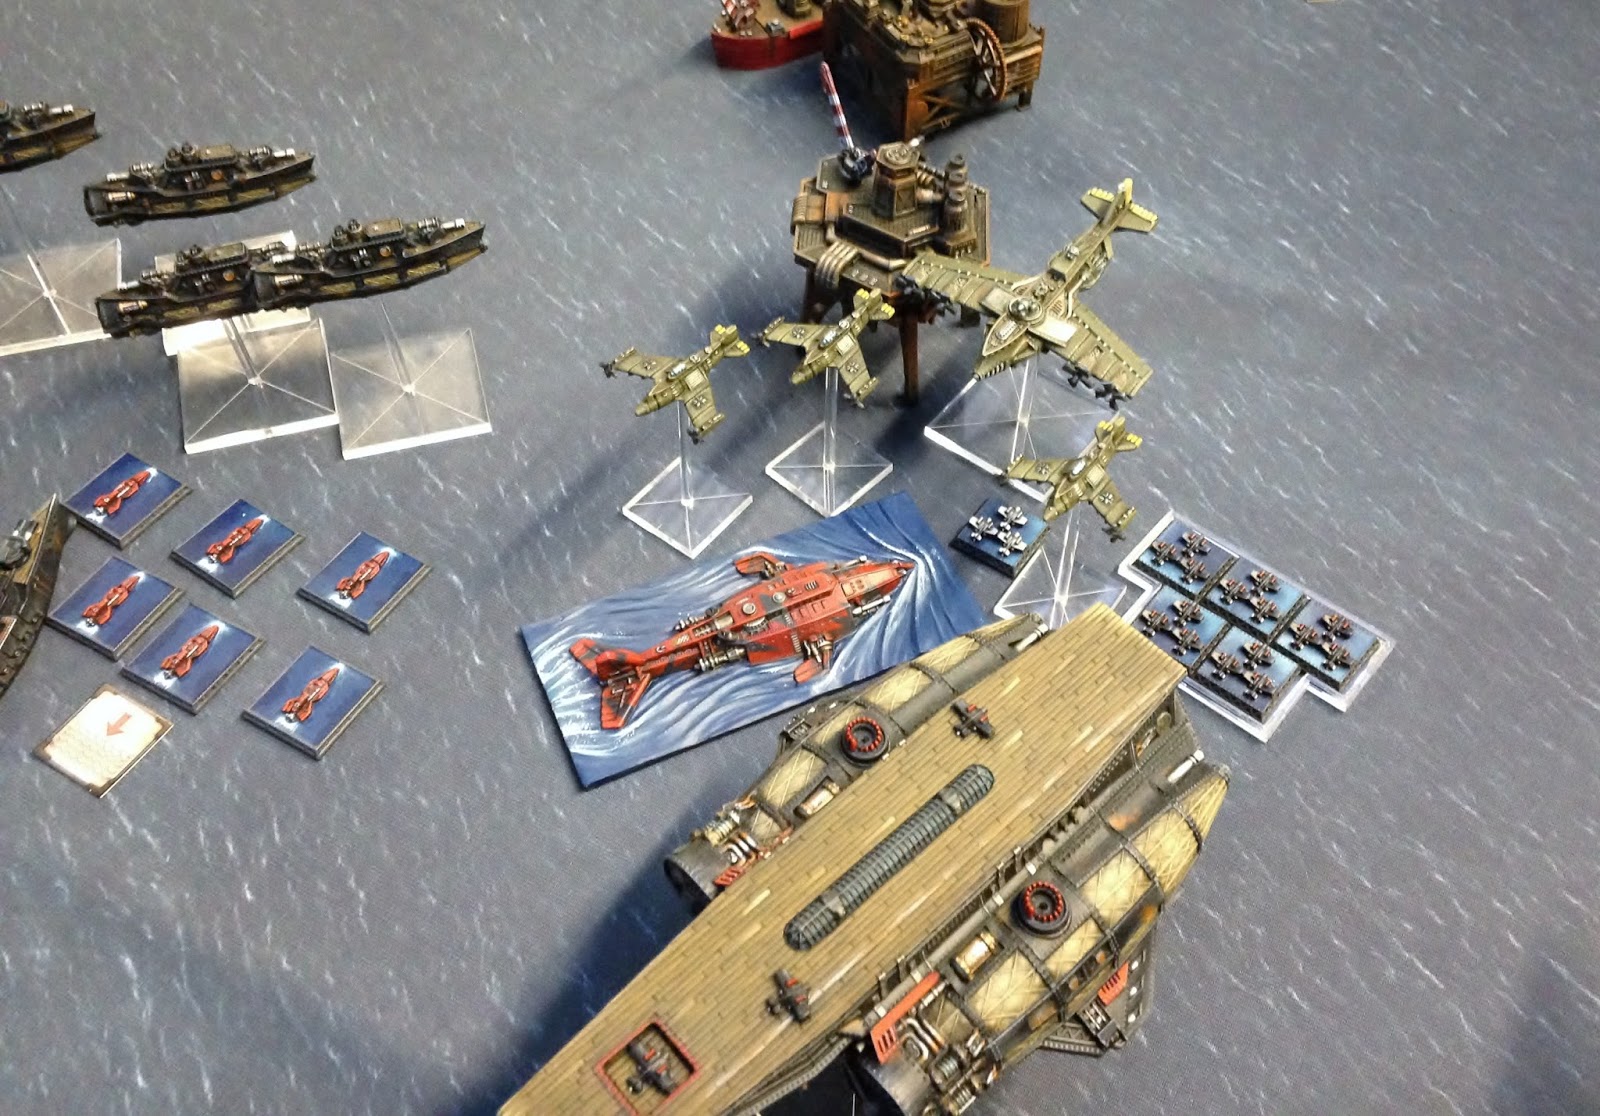
| The aerial elements of the fleet rise over the oil platforms, intent on falling upon the stricken Dreadnought |
 |
| The Prussian fleet utilises the cover of the platforms |
 |
| The larger vessels close on their target, with the smaller squadrons in support overhead and on the flanks |
TURN ONE
 |
| Tentative opening moves from the two fleets as their fighter squadrons launch forward |
 |
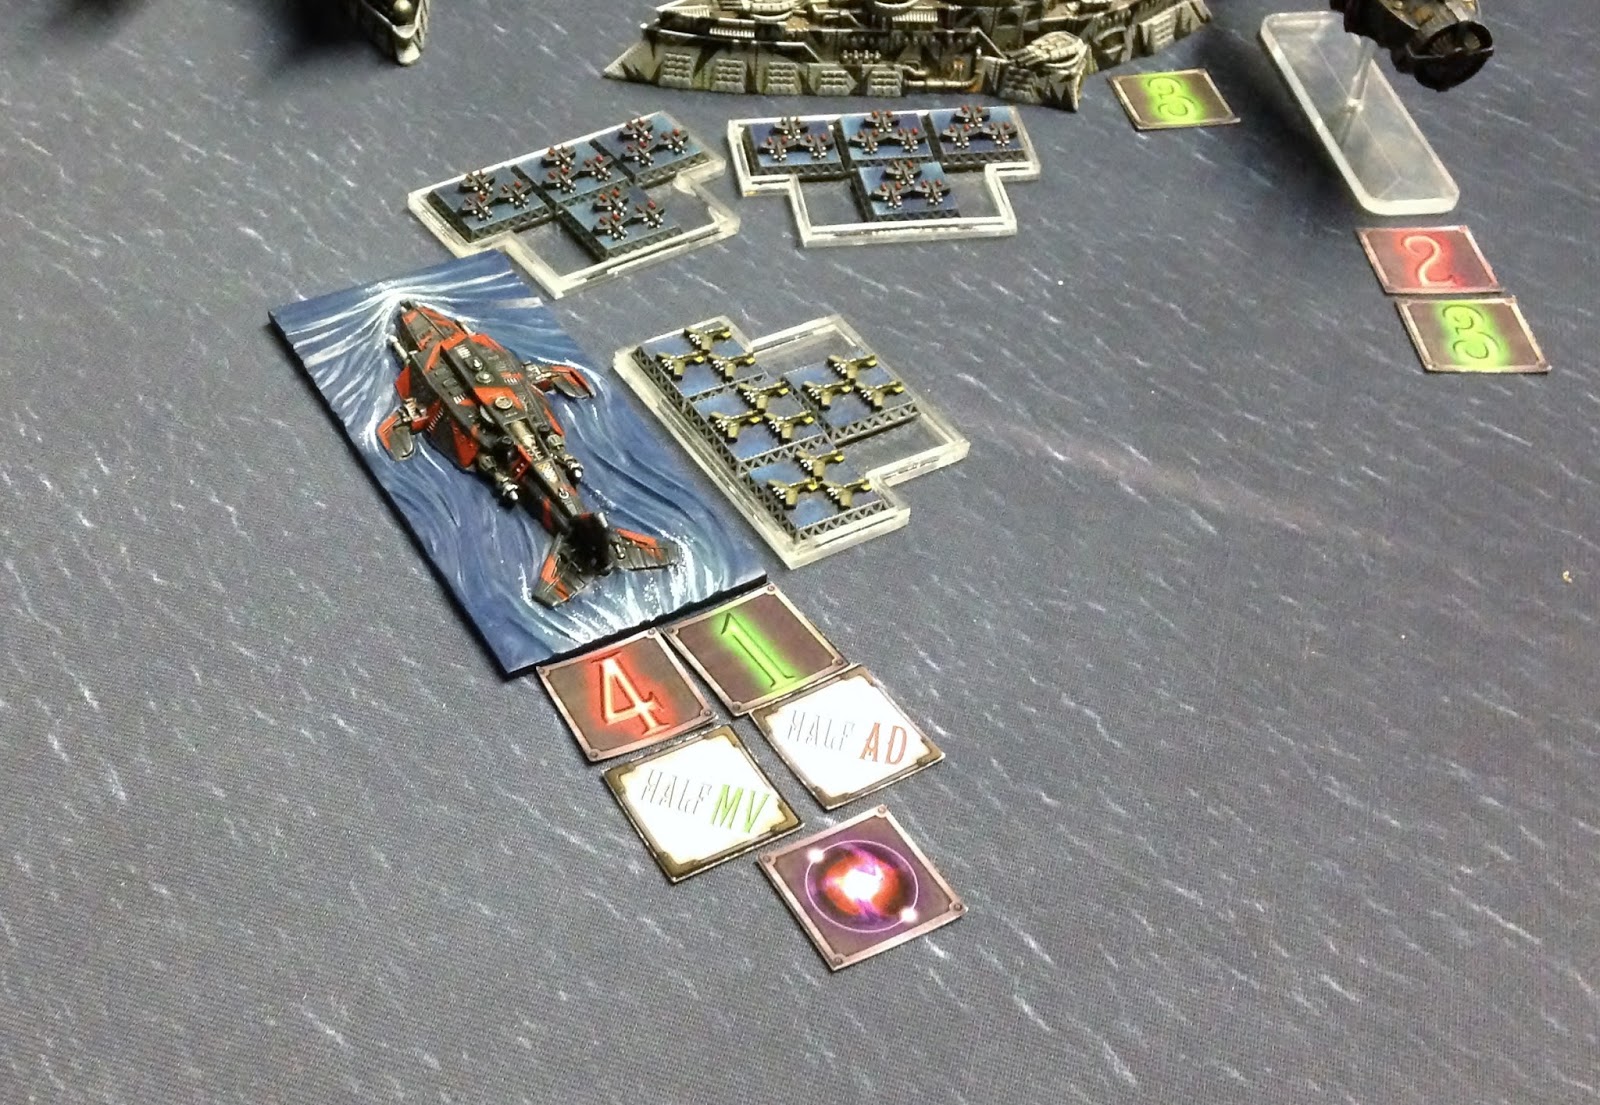
| The Verstarkung Squadron opens fire, damaging the engines of the Manticore-class Support Skimmer |
 |
| Leaping at the opportunity, the Fury-class Frigates move through the rocks and cripple the central Uhlan-class Cruisers |
 |
| The Chimera-class Airships bombard the lead Donnerfaust-class Support Cruiser |
 |
| The Sturmbringer-class Submarine launches a Speerschleuder harpoon into the Chimera-class Airship, but suffers damage in return from the Retribution-class Sky Fortress |
 |
| More electrical fire arcs into the Chimera-class Airships from the Donner Squadron |
 |
| The black Death Bringer-class Submarine emerges from the deep, smashing the second Donnerfaust-class Support Cruiser |
 |
| It disappears beneath the waves, damage done |
 |
| The Elbe-class Fleet Carrier enters the fray, bringing down the damaged Chimera-class Airship with ease |
 |
| Beneath the Retribution-class Sky Fortress, the second Death Bringer-class Submarine rises and opens fire on the Sturmbringer-class Submarine |
 |
| On the starboard flank, the Manticore-class Support Skimmer rips into the Donnerfaust-class Support Cruiser, causing massive damage |
 |
| The Wraith-class Airships unleash their massed turret fire, finishing the damaged vessel |
 |
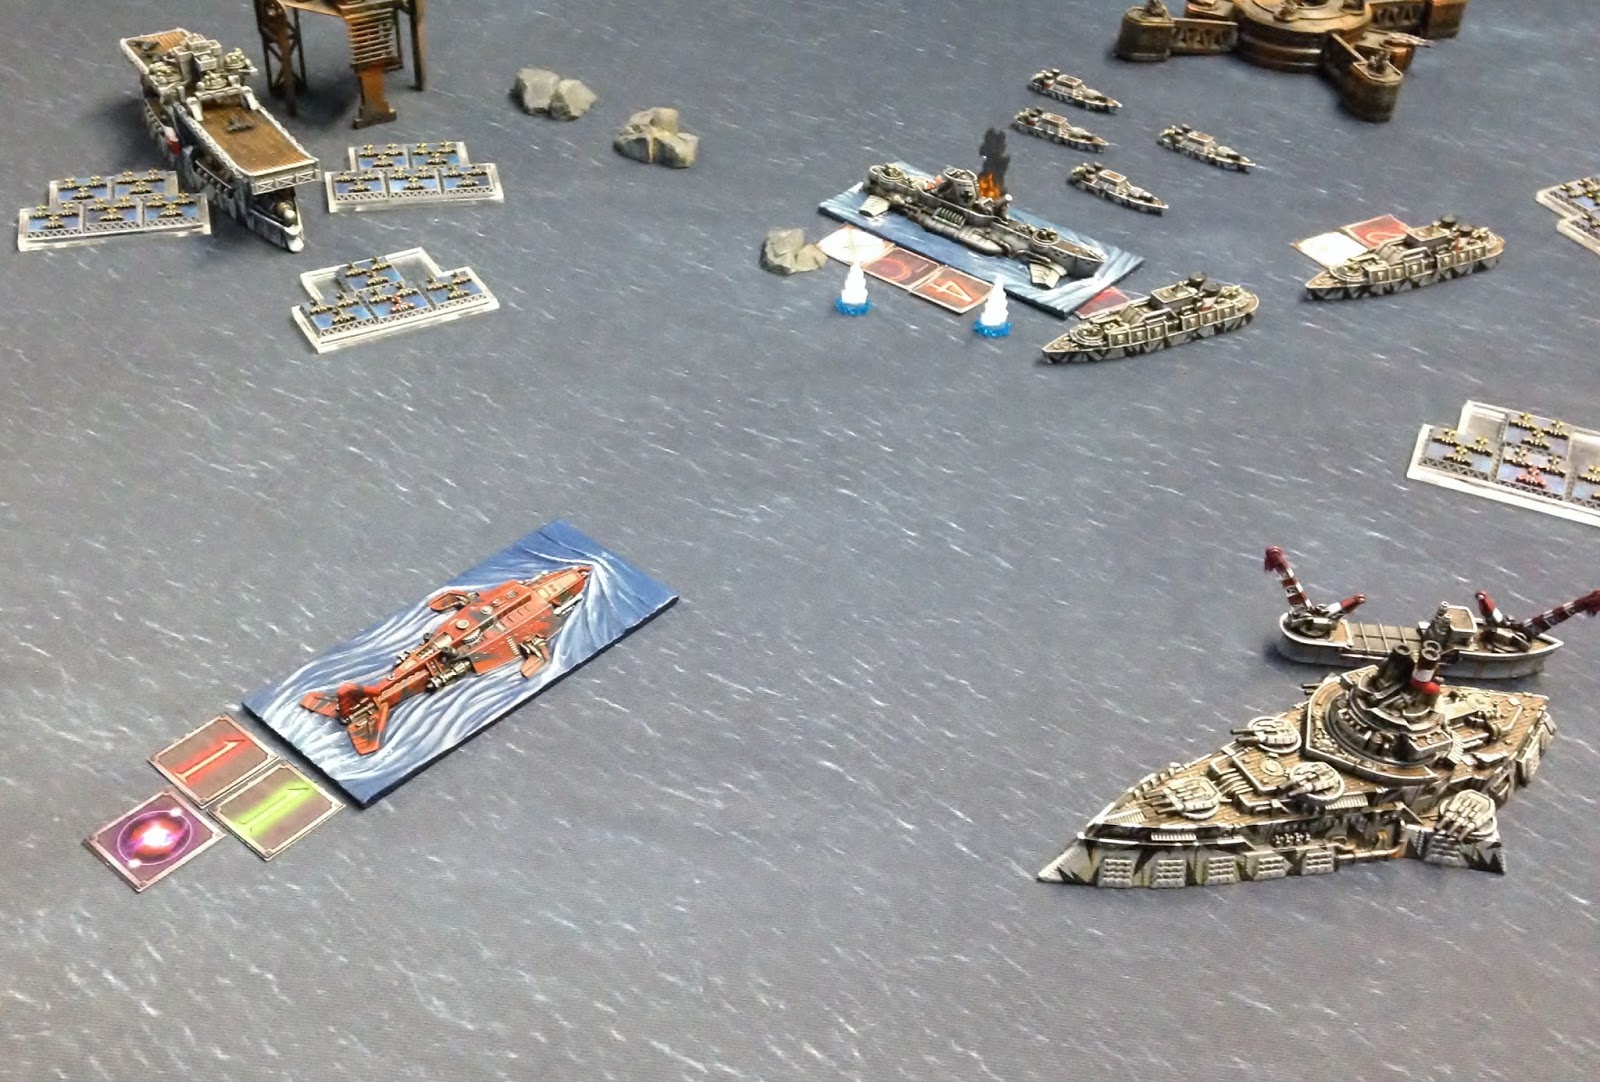
| The two fleets close quickly, with the largest vessels heading towards the beleaguered Dreadnought |
 |
| Both fleets have suffered losses, but the true carnage is about to begin |
TURN TWO
 |
| Taking advantage of the surfaced Death Bringer-class Submarine, the Donner Squadron swoops down from the clouds |
 |
| Poor timing with their bombing run leaves the vessel damaged, but not crippled |
 |
| The Death Bringer-class Submarine launches forward, ripping through the armour of the Sturmbringer-class Submarine with torpedoes and powerful Fore Guns |
 |
| The Donnerfaust-class Support Cruisers flank the Black Company Submarine while the Havel-class Light Carrier presents its broadside, and together they destroy the vessel in one immense volley! |
 |
| Fury-class Frigates struggle against the Verstarkung Squadron, damaging the Hussar-class Gunship and sinking one Uhlan-class Cruiser |
 |
| Evading the Fury-class Frigates, the Verstarkung Squadron turns on the Manticore-class Support Skimmer, but cannot damage it |
 |
| The Retribution-class Sky Fortress drifts forward, launching rockets into the Hussar-class Gunship while the Fore Guns breach the reactor of the Donnerfaust-class Support Cruiser straight ahead |
 |
| The Elbe-class Fleet Carrier unleashes the Tesla batteries into the clouds, landing a Speerschleuder harpoon on the deck of the Retribution-class Sky Fortress |
 |
| The crippled Manticore-class Support Skimmer fails to make an impression on the survivors of the Verstarkung Squadron |
 |
| Faced with colliding with the Havel-class Light Cruiser, the Sturmbringer-class Submarine dives beneath the surface |
 |
| The Nemesis-class Battle Cruiser takes a huge risk, advancing into optimum range and causing critical damage on the Elbe-class Fleet Carrier |
 |
| Dive Bombers smash the rudder of the Nemesis-class Battle Cruiser |
 |
| Black Company fighters move to intercept Prussian bombers |
 |
| The massed airpower of the Prussian Navy prevails and another squadron launch themselves upon the Nemesis-class Battle Cruiser |
 |
| Massed turrets from the Wraith-class Airships rake the decks of the Elbe-class Fleet Carrier |
 |
| On the far starboard flank, the second Nemesis-class Battle Cruiser opens fire at point-blank range into the Donnerfaust-class Support Cruiser |
 |
| In a blinding flash of Sturginium, the stricken vessel disappears before dropping out of the sky some distance back and sinking like a stone |
 |
| Wraith-class Airships suffer the attentions of the Prussian interceptors, losing one of their number |
 |
| The Manticore-class Support Skimmer advances up the starboard flank, crippling the Havel-class Light Carrier with a volley from the Main Turret and Fore Guns |
 |
| Another Light Airship is dragged down by Prussian fighter planes |
 |
| The Fury-class Frigates sweep to the port, destroying the Hussar-class Gunship with their hull-mounted weaponry |
 |
| Swarmed by Prussian fighters, a third Wraith-class Airship explodes in the air |
 |
| Reaper-class Attack Submarines harry the damaged Havel-class Light Cruiser |
 |
| Saxony-class Corvettes advance from behind the platforms, their boarding parties and turret fire destroying two Fury-class Frigates and damaging a third |
 |
| The Chimera-class Airships move forward and attack a Donnerfaust-class Support Cruiser. It violently displaces from reality, appearing amidst the hull of an Arminius-class Frigate to the stern and destroying them both messily |
 |
| The last remaining Donnerfaust-class Support Cruiser, crippled and suffering a major reactor leak, finally succumbs to its injuries and falls below the surface |
 |
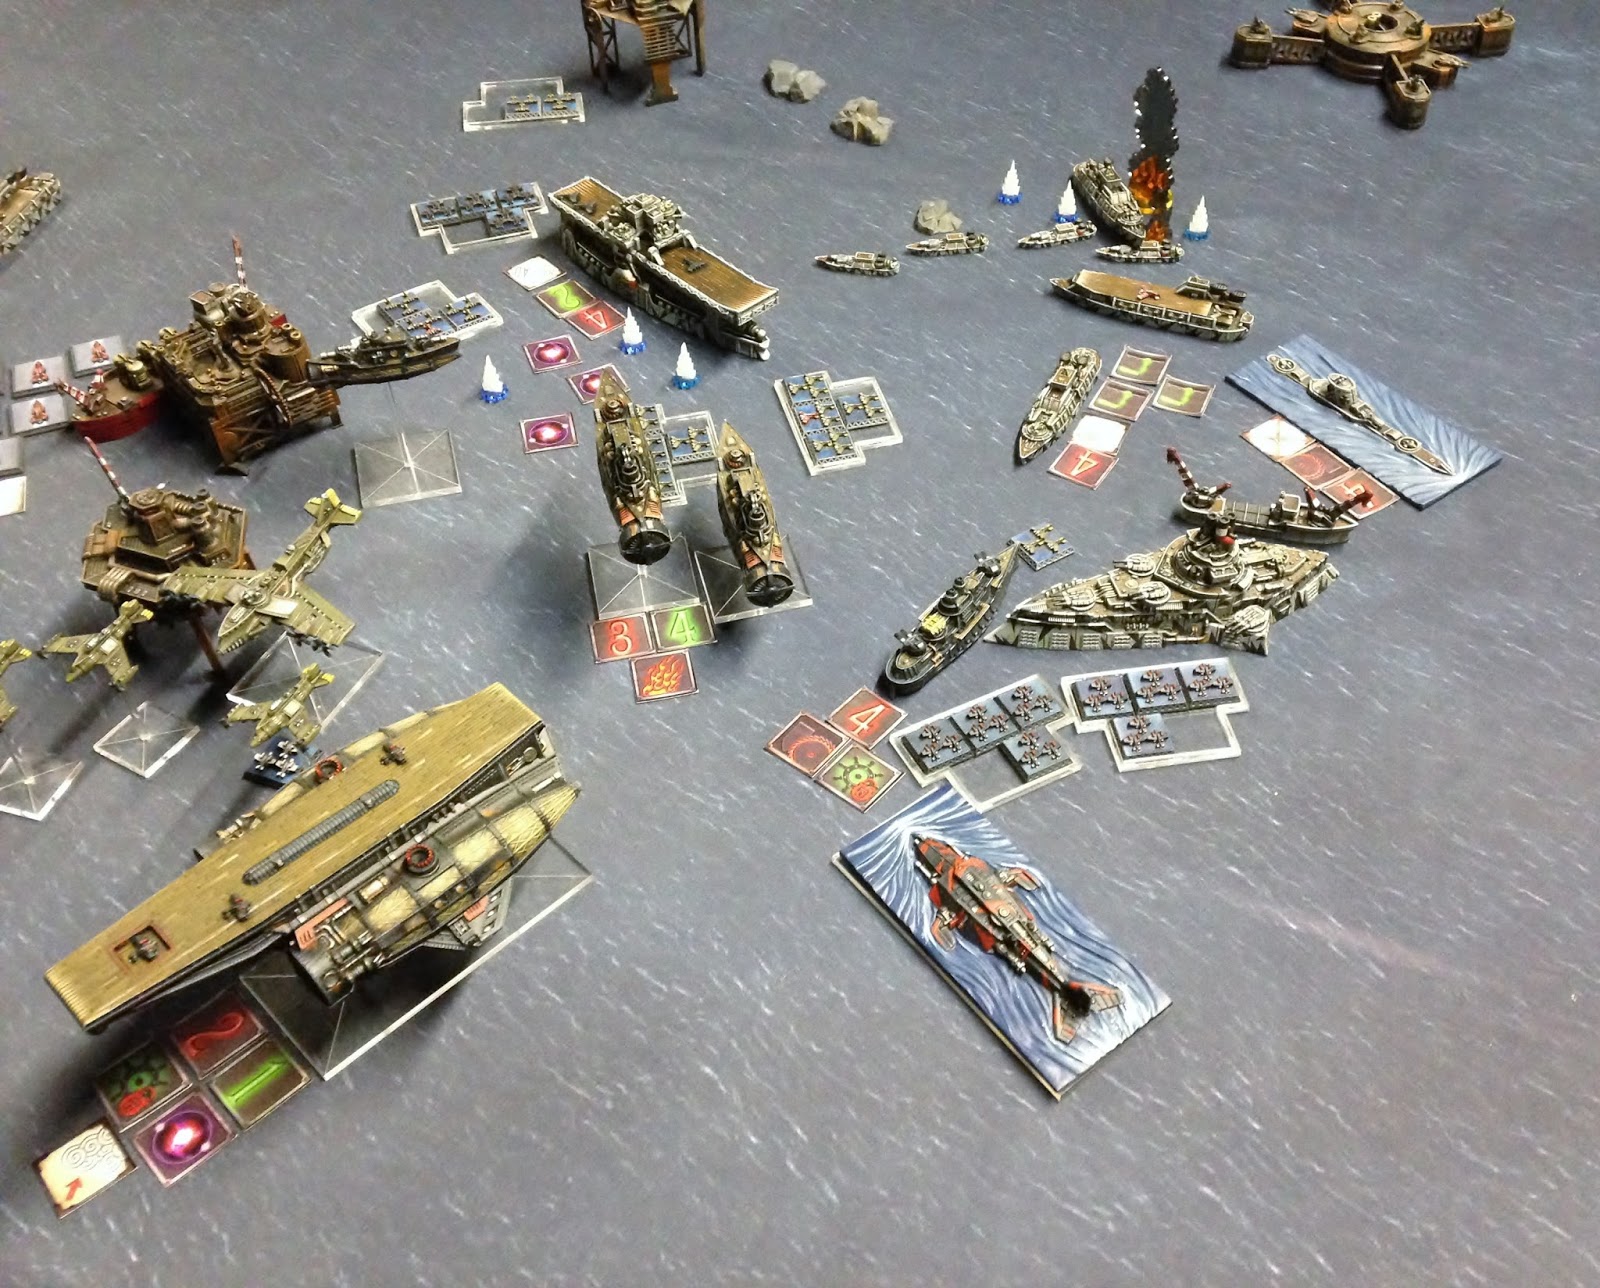
| The two fleets have engaged bloodily, with both sides claiming significant kills. Neither side has attempted to board the Markgraf at this point, biding their time for the moment |
 |
| On the port-side, the Fury-class Frigates have damaged the Verstarkung Squadron but must now contend with the Saxony-class Corvettes |
 |
| In the swirling maelstrom at the centre, dozens of warplanes and airships dance above the brawling naval vessels |
TURN THREE
 |
| The Elbe-class Fleet Carrier smashes forward. Another blinding flash of Sturginium sees the Nemesis-class Battle Cruiser teleport across the ocean, falling into the water off the flank of the Sturmbringer-class Submarine. The Fleet Carrier continues to fire in all directions, ripping a Chimera-class Airship out of the sky, damaging the Death Bringer-class Submarine before it and landing another harpoon onto the deck of the Retribution-class Sky Fortress |
 |
| The surviving Nemesis-class Battle Cruiser arcs around behind the Prussian fleet, boarding parties scuttling the Havel-class Light Carrier while turrets batter the Elbe-class Fleet Carrier |
 |
| The Donner Squadron rips into the stern of the Retribution-class Sky Fortress |
 |
| A fourth blinding flash of Sturginium sees the immense vessel disappear from reality for a brief moment, before crashing back above an oil platform, having suffered massive structural damage and facing in the wrong direction |
 |
| The Manticore-class Support Skimmer moves to protect the Sky Fortress, but cannot stop the Arminius-class Frigates |
 |
| They sweep under the Sky Fortress and arc their Tesla-weaponry up into the vessel |
 |
| The Retribution-class Sky Fortress is finally dragged down, plunging into the oil platform below |
 |
| The second Manticore-class Support Skimmer moves up, firing the Main Turret back into the last Uhlan-class Cruiser. In then deploys half of its boarding parties onto the Markgraf |
 |
| Dive Bombers wreak havoc on the exposed Death Bringer-class Submarine |
 |
| Plunging forward nonetheless, the Death Bringer-class Submarine obliterates an Arminius-class Frigate with a volley of torpedoes |
 |
| The Uhlan-class Cruiser moves to block the path of the Fury-class Frigates, and damages the Manticore-class Support Skimmer with turret fire |
 |
| Reaper-class Attack Submarines clear the way |
 |
| The Sturmbringer-class Submarines rises from the deep |
 |
| Tesla-weaponry launches to the port, finishing the Death Bringer-class Submarine in an incredible show of force |
 |
| Luftlancers launch onto the Manticore-class Support Skimmer, but both crews suffer mutual annihilation |
 |
| The Fury-class Frigates maneuver forward, their Fore Guns destroying two of the Saxony-class Corvettes as their boarding parties launch onto the exposed Sturmbringer-class Submarine and capture it. A fine prize for the Black Company! |
 |
| Fighter harry the last Wraith-class Airship into a watery grave |
 |
| The last Chimera-class Airship launches ineffective rockets into the Donner Squadron, before pouring all of its boarding parties onto the deck of the Markgraf |
 |
| Fury-class Corvettes move against the Saxony-class Corvettes, but their ordnance and boarding parties cannot finish the squadron |
 |
| Reaper-class Attack Submarines pour fire into the Elbe-class Fleet Carrier |
 |
| Tesla-weaponry and boarding parties from the Havel-class Light Carrier bring down the Chimera-class Airship but do not damage the Manticore-class Support Skimmer |
 |
| Collision! One Saxony-class Corvette is lost ramming the Fury-class Frigate. The second moves in support of the Markgraf and surrounding squadrons |
 |
| Close-range bombardment has decimated both fleets, and the last grab for the Markgraf must begin |
 |
| Black Company boarding parties rampage through the decks of the Markgraf, but can they hold it? |
 |
| The Prussian Navy maintains several aces in its hand |
TURN FOUR
 |
| The Nemesis-class Battle Cruiser makes a last gambit, crippling almost unto death the Elbe-class Fleet Carrier and smashing one of the Arminius-class Frigates. Crucially, it has failed to finish the Prussian flagship |
 |
| The Elbe-class Fleet Carrier moves close to the Dreadnought, Tesla-weaponry causing minor damage to a Fury-class Frigate as the Luftlancers pour onto the target. In a bloody combat, both sides are wiped out! The Markgraf stands uncontested! |
 |
| Reaper-class Attack Submarines cannot stop the Havel-class Light Carrier finishing one Manticore-class Support Skimmer and damaging the second, while its crew claims the Markgraf |
 |
| The half-strength squadron of Fury-class Frigates finish the last Saxony-class Corvette |
 |
| Reaper-class Attack Submarines fail to finish the mighty Elbe-class Fleet Carrier |
 |
| Black Company fighter planes strafe the Markgraf, killing some of the Prize Crew |
 |
| The Donner Squadron move in for the killing blow, raking the Fury-class Frigates as their crews board the Markgraf and flood it with Prussian troops |
 |
| The last Arminius-class Frigate finishes the ruined Manticore-class Support Skimmer |
 |
| The Fury-class Frigates make their last-ditch attack, ripping the heart from the Elbe-class Fleet Carrier and finally destroying it, but their last remaining boarding parties cannot achieve a foothold on the Markgraf and it remains in Prussian hands |
 |
| A wideshot shows the battle drawing to a close, and the loss of the Prussian Fleet Carrier |
 |
| The Black Company have scored significant damage, but with the Markgraf unassailable and the Donner Squadron circling overhead, they are forced to withdraw |
THE AFTERMATH
 |
| The surviving Prussian forces escort the Markgraf back into their territorial waters |
 |
| The battered remnants of the Black Company flee the North Sea, dragging their prize with them |
Mike and his Prussians scored 1,532 Victory Points and achieved the Objective by holding the Markgraf with eight Assault Points, while the Black Company only scored 1,435 Victory Points. A close match, but ultimately, it was a VICTORY for the Prussian Empire!
CONCLUSIONS AND LEARNING POINTS
Once again, the power of the Prussian Empire has prevailed and the Markgraf remains in their hands. This game was tight, with huge losses on both sides, but ultimately the power of Tesla weaponry outshone the immense ordnance of the Black Company and left them unable to complete the mission.
Almost all of Mike's squadrons fielded Tesla-weaponry, and it showed when certain squadrons were hit with Speerschleuder harpoons. Devastating Ordnance is one of the best rules in the game, and combines well with the number of dice the Tesla-weaponry can throw out.
So much Tesla-weaponry on the board obviously made for some weird weather conditions and messed with our Generators, as we rolled no less than four Sturginium Flares during the game! This only resulted on one collision, but it was still quite a sight! No Magazine Explosions makes me sad though.
The deployment of two new Specialist Squadrons was important for the Prussian Empire, as the Verstärkung Squadron and the Donner Squadron both proved their worth during the game. The Donner Squadron in particular caused untold damage to the Black Wolf Mercenaries, destroying several vessels and securing the focal point with their crews in the last turn.
The mercenaries did little to counter their power, as the AA of the squadron protected them from rocket fire and they flew too high to be a good target for the ordnance. Mike played well with them, and though I had opportunities to deal with them, other tempting targets took my attention. I think in the future I will need some dedicated interceptors.
The Black Company felt powerful, and caused a LOT of damage when they could get into close range, but ultimately their small squadrons and extortionate Strategic Values hurt them. Perhaps I could do with more cheap squadrons like the Fury-class Frigates and aerial units, as they can bring numbers to the fleet.
The Reaper-class Attack Submarines were occasionally awesome, and mostly okay. I am still not sold on tiny, ordnance-based squadrons like this (I prefer the boarding-based ones like the Turtle, Crocodile and Stingray), but they are a nice addition to the fleet and can chase down things the larger vessels miss.
The dice rolls for both of us were fairly average across the game, though I did have some particularly poor rolls in the final turn that did not help! Overall Mike proved the wisdom of Linking everything, and scored a number of triple critical results that ruined my Submarines. Splitting fire with my Main Turrets on the Nemesis-class Battle Cruisers could have paid off and caused massive damage, but did not work out in the end.
The positioning of the Death Bringer-class Submarines was fairly poor, and they should have been placed further on the flanks. I was foolish to waste them for minimal return, especially the red one in the second turn.
Mike comments the Havel-class Light Carriers are best in the Late Game, and I must agree. Their broadsides are bloody annoying and they are tough, meaning with good positioning they are usually fully operational in the last turns of the game. This is difficult to deal with when the rest of the Prussian fleet takes so much effort to bring down - battered Battle Cruisers and under-strength Frigate squadrons struggle against undamaged Light Carriers.
Overall it was tight game that really kicked in on Turn Three. The scenario gave us something different to think about, and rewarded holding back squadrons with large crew complements. I feel my activation order and positioning let the Black Company down, while Mike played the Prussians to their strengths and punished me for my mistakes.
Next time, we may see the Russian Coalition return to sea, with some Specialist Squadrons of their own!
THE NARRATIVE
"In the face of destruction, the Markgraf had been saved from an ignominious fate and the mercenaries of the Black Company sent reeling. The cost had been extortionate - the loss of the Fleet Carrier Kaiserin Elisabeth II was a huge blow for Prussian efforts in the North Sea, while the capture of the U-113 meant the loss of Submarine Commander Grönemeyer, a brilliant hunter and personal friend to Baron Grunner.
The net was closing in on the Markgraf as more and more Russian squadrons poured into the North Sea, while the Britannians began mustering their own Battle Groups alongside mercenaries and lesser fleets from their colonial allies. For all his victories, the Baron was running out of ships, and support from the Prussian Naval Command was rapidly drawing thin.
Grunner's answer, of course, was to find some allies of his own..."
Thanks for reading,
George


Great battle report and the scenario looks fun. Might those future allies be Danes?
ReplyDeleteIt's always a pleasure to read your battle reports, thanks a lot, George. Great work!
ReplyDeleteThese look awesome. It really makes me want to pick up DW again...
ReplyDeleteFantastic looking game. Always a fan of your reports - great pictures and loads of them!
ReplyDelete